
REVIEW · PRIVATE
Natural Indigo Dyeing with Local Masters (Private Atelier)
A huge working vat, a family craft passed down for centuries, and your own cloth changing from green to blue: that is the heart of this Kyoto workshop. You work inside a real 300-year-old indigo studio, not a modern copy made for tour groups.
I especially like the small size, capped at six people, and the patient help during the folding and dyeing. The bilingual support, including Sakura, makes the artisan demonstrations much easier to follow. One thing to consider: the studio is a traditional wooden space with no wheelchair access, and you should wear clothes that can handle a stray splash.
In This Review
- Key points
- A 300-year-old studio in western Kyoto
- What the first 15 minutes reveal about indigo
- Folding and binding your own furoshiki
- Why natural fermented indigo changes the value
- Tea, stories, and a slower finish
- Choosing the right item for your project
- What the instruction is like in English
- Is $95 a fair price?
- Who will enjoy this workshop most
- Timing, clothing, and practical planning
- Should you book this indigo workshop?
- FAQ
- Where does the indigo dyeing workshop take place?
- How long does the experience last?
- What item is included in the price?
- Can I choose a scarf instead?
- Is the workshop conducted in English?
- Is the workshop suitable for children?
- What should I wear and bring?
- Is the studio wheelchair accessible?
Key points
- A real working dye house: See the large vats used for serious textile production, including kimono fabric.
- Fermented indigo only: The studio uses natural sukumo, not a chemical blue dye.
- Your own Kyoto keepsake: Dye one cotton furoshiki, about 45 to 50 centimeters, and take it home.
- Small-group instruction: With no more than six participants, you get close help with folding, binding, and dipping.
- A useful cultural finish: Indigo leaf tea and a furoshiki-wrapping demonstration add context beyond the craft itself.
- Optional upgrades: Cotton or silk scarves and a wool stole are available for an extra charge on site.
A 300-year-old studio in western Kyoto
The exact address is shared after booking, which helps protect the privacy of this working family studio. You reach the area in about 30 minutes from Kyoto Station by train and on foot, so allow enough time before the scheduled start.
Do not expect a glossy craft shop with bright signs and a large reception desk. You enter a traditional space with wooden floorboards, old tools, vats, and the working atmosphere of a place that has made dyed cloth for generations. That setting is a major part of the value.
The studio is linked to a multi-generational dyeing family, and this arrangement gives international visitors access to a place that normally operates outside the usual sightseeing circuit. The experience is offered in English and Japanese, with a bilingual cultural host helping explain the artisans’ words and actions.
The small setting matters. Six people is enough for a friendly group, but not so many that you are left watching from the back. If you have a question about the color, the cloth, or the tools, there is a fair chance to ask it while the process is happening.
A few more Kyoto trips to weigh up
- Fushimi Inari Hidden Hiking Tour (Private Option Available)
★ 5.0 · 1,750 reviews - Private Kyoto Tour with a Local, Highlights & Hidden Gems, Personalised
★ 5.0 · 1,543 reviews - Kyoto 6hr Private Tour with Government-Licensed Guide
★ 5.0 · 1,369 reviews
What the first 15 minutes reveal about indigo
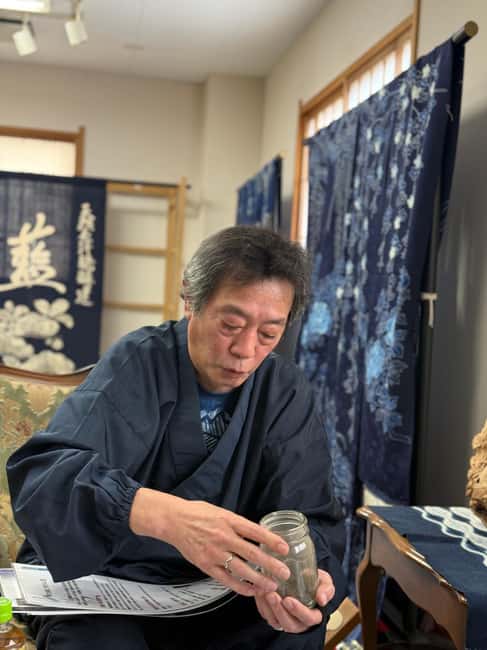
The opening studio visit lasts about 15 minutes. You hear about the history of indigo in Japan and its role in daily life, then look over the tools and vats before touching the cloth.
This short introduction gives the activity a useful frame. You are not simply making a blue souvenir. You learn that the color comes from fermented indigo leaves, known as sukumo, and that producing a stable dye bath takes care and time.
The large vats are one of the most memorable parts of the visit. They are used for much larger textile work, including kimono fabrics, so seeing them gives you a better sense of the scale of the trade. The workshop item is small enough for a first attempt, but the studio itself shows how demanding professional dye work can be.
The process is also a good lesson in patience. The color does not appear as a finished dark blue the moment the cloth leaves the vat. The material may look green at first, then turns blue as it meets the air. That change is simple to watch but surprisingly satisfying.
Folding and binding your own furoshiki
The main hands-on section lasts about 60 minutes. You begin with a cotton furoshiki measuring roughly 45 to 50 centimeters, included in the $95 price.
A furoshiki is a square cloth used in Japan for wrapping and carrying items. The studio also demonstrates traditional furoshiki wrapping methods, so you leave with more than a colored piece of fabric. You get an idea of how the cloth fits into everyday Japanese life.
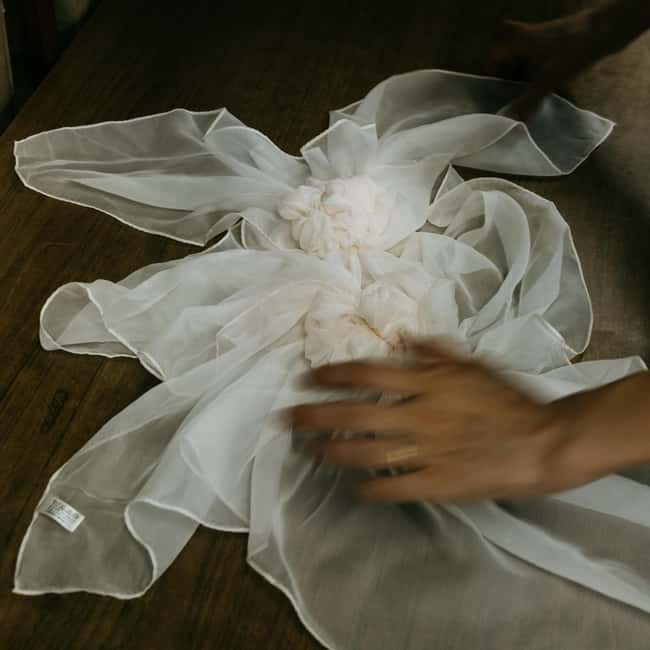
The artisans guide you through folding and binding the fabric before it goes into the vat. This is the shibori side of the activity, where the tied or folded sections resist the dye and create patterns. You do not need previous craft experience. The appeal is partly in making deliberate choices and partly in accepting that the final pattern will have a little surprise in it.
Take your time here. The shape of each fold and the tightness of each binding affect the result. The staff are there to help, and the limited group size means you can receive hands-on guidance rather than a quick demonstration followed by guesswork.
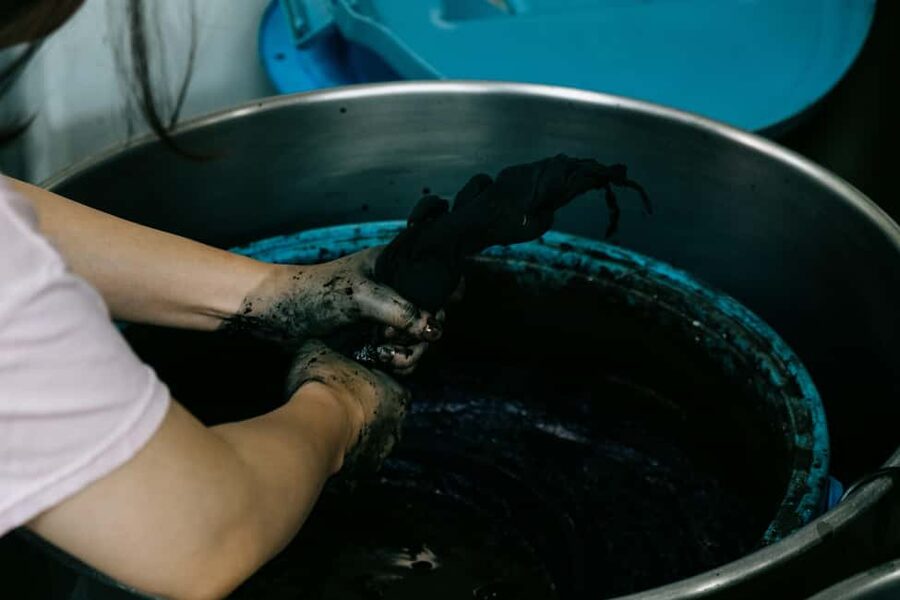
The dyeing itself is not just a single dip. You follow the instructions for using the natural vat, then watch the cloth shift in color as it oxidizes. The final blue may vary according to the folds and the handling, which is exactly why the piece feels personal.
Aprons, gloves, and shoe covers are provided. Those details matter because natural dye can stain clothing and shoes. I would still wear casual clothes you do not mind getting dirty, since there is no changing room.
Why natural fermented indigo changes the value
The studio uses fermented indigo, rather than a prepared chemical dye. That distinction is important if you care about traditional textile work.
The blue comes from indigo leaves that have been processed into sukumo and maintained in a working vat. The dye bath requires attention, and the color depends on the condition of that vat. You are seeing a living craft process, not simply mixing powder with water.
This also explains why the artisans spend time on the background before you start. The work involves more than dipping fabric into blue liquid. It includes preparing the plant material, maintaining the vat, controlling the cloth, and building consistent color over time.
For many people, the best part is seeing the contrast between the industrial-looking vats and the quiet, careful handwork. The studio can handle serious textile production, yet the workshop lets you try a small part of that same method yourself.
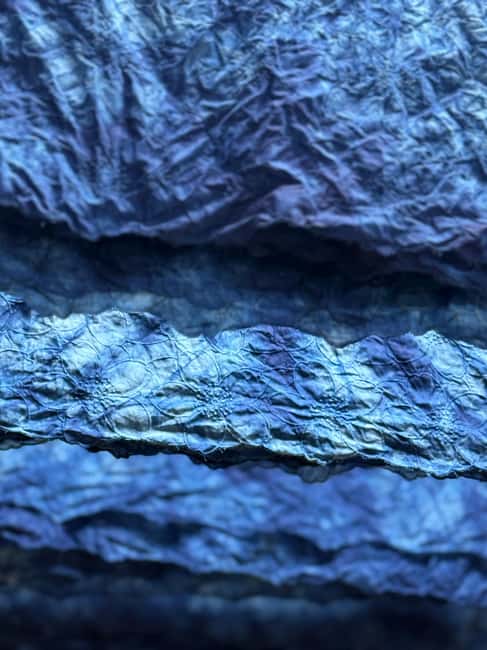
A natural dye class can be a poor fit if you want a perfectly predictable result or a fast, polished souvenir. It is better suited to someone who enjoys process, texture, and the small differences created by hand.
Same city, a completely different kind of day:
- PERFECT KYOTO 1-Day Bus Tour
★ 5.0 · 13,518 reviews - Kyoto: Fushimi Inari, Kinkakuji, Bamboo Grove 1 Day Bus Tour
★ 4.8 · 4,316 reviews - Kyoto: Tea Ceremony in a Traditional Tea House in Kiyomizu
★ 4.9 · 3,519 reviews - Kyoto Geisha Walking Tour: Gion District & Hidden Gems
★ 4.7 · 3,273 reviews
Tea, stories, and a slower finish
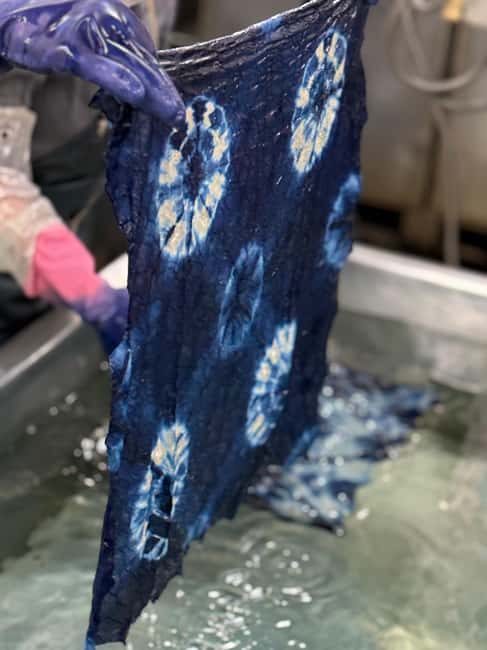
After the dyeing, you sit down for indigo leaf tea and a closing conversation. This final 15 to 20 minutes gives the activity a calmer rhythm after the practical work.
The tea is herbal and included in the price. It is not a meal or snack, so plan to eat before or after if you need something substantial. The host can answer questions, explain more about the studio, and help you look at the finished piece.
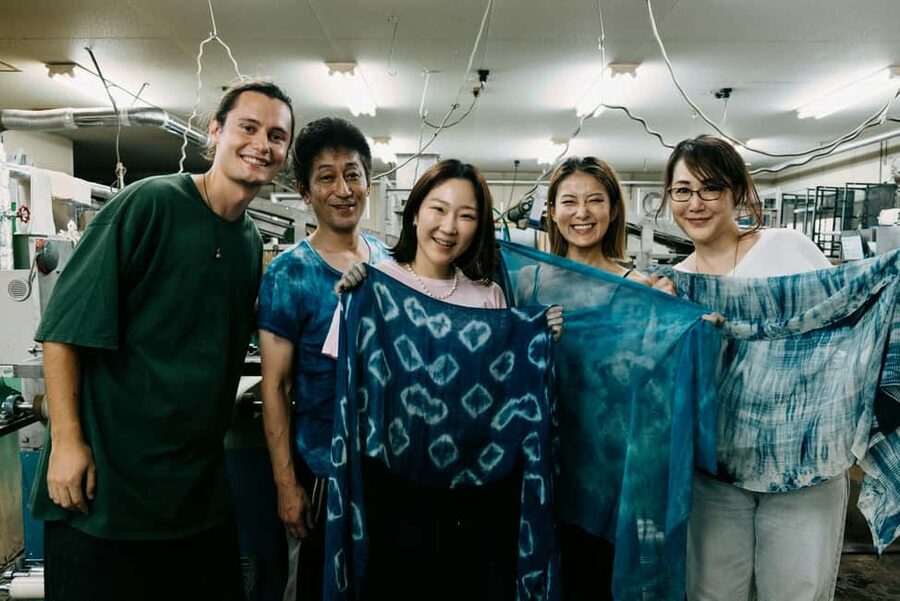
The conversation also gives you time to take photographs. You can pose with your dyed cloth and see the studio displays, including finished textile work and kimono pieces. The atmosphere is more personal than a quick retail stop, and the small souvenir gift adds one more modest reminder of the visit.
The closing is especially useful if you want to understand the craft rather than rush away with a wet or newly finished item. You have a chance to see the pattern clearly, ask how to care for it, and appreciate the difference between your first attempt and the work made by the family artisans.
Choosing the right item for your project
The included cotton furoshiki is a sensible choice for most people. It is large enough to show a pattern clearly, light enough to handle, and useful once you return home.
The activity information also describes a basic option involving a large embroidered handkerchief or a traditional tenugui, while the included materials specifically identify one cotton furoshiki. Since the item descriptions are not perfectly consistent, confirm the available base item when you book or arrive.
You may be able to pay extra for a different piece on the day. The listed upgrades include:
- A lightweight cotton scarf
- A silk scarf with a more luxurious feel
- A wool stole made from Mongolian wool
An upgrade can make sense if you want something to wear or use often. One participant chose a cotton scarf and considered it worth the extra cost. A scarf also gives the color pattern more room to show than a small square cloth.
Still, do not assume every upgrade will suit your budget or be available in every session. The additional fee is paid on site, so bring extra money if you want the option to buy a larger item or look at finished dyed goods in the gallery and shop.
The studio also offers dyed pieces for purchase, including hand-stitched and dyed furoshiki. That is separate from the included workshop item. If you prefer to buy an artisan-made piece rather than make one, you can browse after the class.
What the instruction is like in English
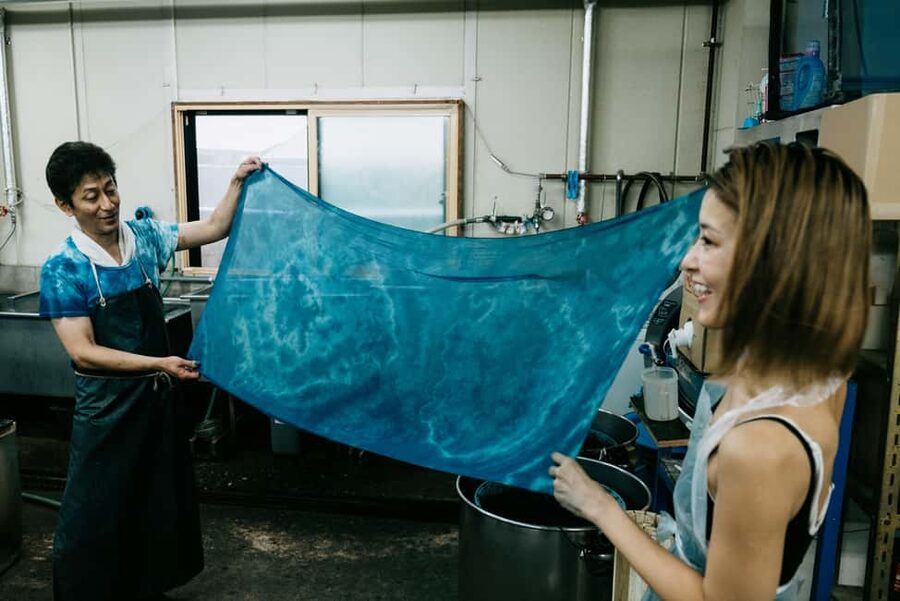
The artisans lead the practical work, while the bilingual host handles cultural explanation and translation. Sakura has been especially helpful during the history talk, shibori steps, and dyeing process, explaining the master’s demonstrations clearly.
That support changes the feel of the activity. Textile work uses small hand movements that can be hard to understand from a distance, and translation helps you catch the reason behind each step. You can also ask questions without relying only on gestures.
The staff are described as patient and keen to help you produce a good result. That does not mean they take over the work. You still fold, bind, dip, and reveal the fabric yourself, but you are not left alone with a confusing set of instructions.
English and Japanese are the available languages. If you need support in another language, you should arrange your own assistance, since multilingual interpretation beyond English and Japanese is not included.
Is $95 a fair price?
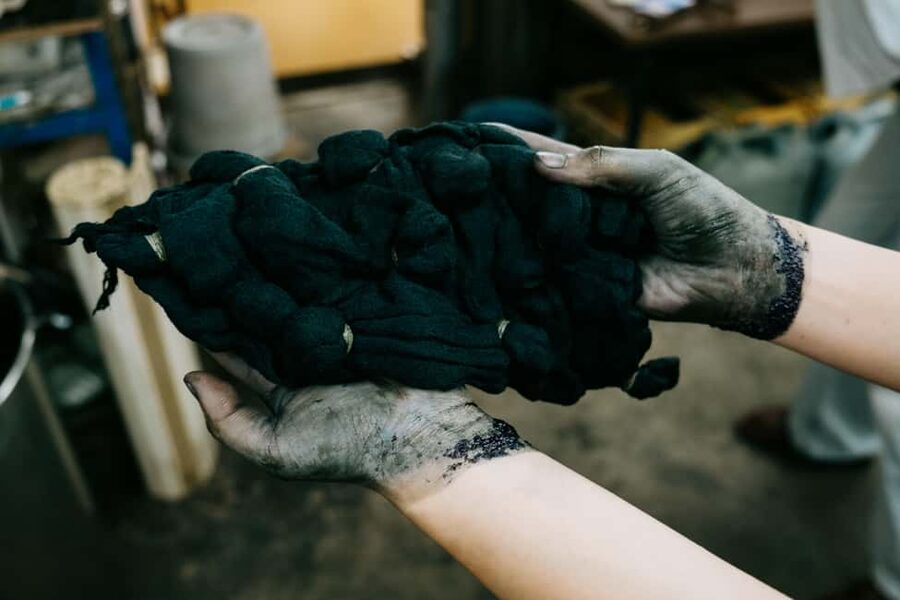
At $95 per person, this is not Kyoto’s cheapest craft class. The price makes more sense when you look at what surrounds the one-hour dye session.
You are paying for access to a private historic studio, instruction from working artisans, use of a real fermented indigo vat, one cotton furoshiki, tea, translation, an apron, materials, and a small souvenir. The group limit of six also means the fee supports a more personal session than a large factory-style class.
The value is strongest for you if the setting matters as much as the finished cloth. A cheaper activity may provide dye, fabric, and a short lesson, but it is less likely to take place inside a family studio with large production vats and a long connection to the craft.
The value is weaker if your main goal is simply to leave with a large wearable item. The base price covers one small furoshiki, while scarves and a wool stole cost extra. Transportation, food, and shipping are also separate.
Shipping may be available on request for an additional fee. Ask about this if the fabric is not fully convenient to carry during the rest of your Japan trip.
Who will enjoy this workshop most
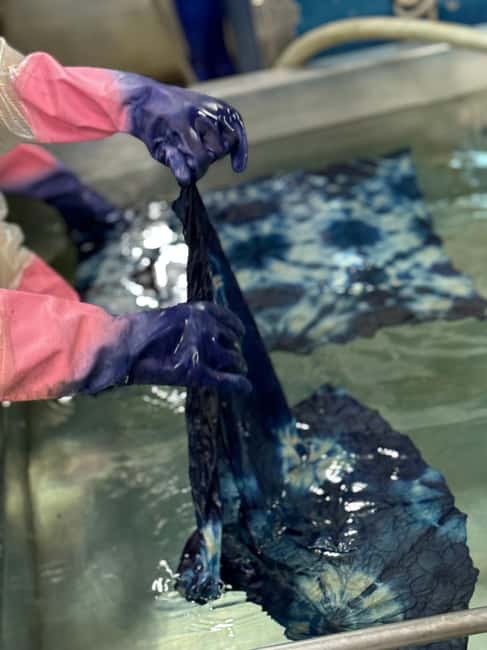
I would recommend it to people who like handmade objects, Japanese design, plant dyes, or quiet cultural activities. It works well for adults, families, and children age eight and older.
It is also a good choice for a rainy afternoon or a break from Kyoto’s major temples. You spend the time doing something with your hands, and the finished item gives you a more useful memory than another photograph.
The activity suits families because the color change is easy to follow and the staff provide close guidance. Children should still wear clothes that can get dirty and follow instructions around the vats.
You may want to skip it if you need full wheelchair access. The traditional wooden floorboards and lack of wheelchair access are clear limitations. It may also disappoint anyone expecting a large garment, a full meal, or a fully private session for one household.
The maximum group size is six, but the activity is described as a small-group experience rather than a private booking for one party. Check the booking details if you need exclusive use of the studio.
Timing, clothing, and practical planning
Plan on about two hours, although the stated duration can range from 1.5 to 2 hours. The itinerary itself breaks down into roughly 15 minutes of introduction, 60 minutes of dye work, and 15 to 20 minutes of tea and reflection, with a little time around those sections for questions and photographs.
Wear comfortable shoes for the train ride and walk to the studio. Choose casual clothes that can get dirty, even though protective gear is provided. There is no clothing change room.
The exact address arrives after booking, so do not plan to find the studio by wandering around the western district. Allow about 30 minutes from Kyoto Station by train and on foot, then leave a little extra time for finding the meeting point.
The activity offers free cancellation up to 24 hours in advance, and you can reserve and pay later. Those terms are useful when you are arranging a Kyoto schedule around weather, temple visits, and train times.
Should you book this indigo workshop?
Book it if you want a close look at a living Japanese craft and would rather make one meaningful item than collect a quick souvenir. The real studio, fermented indigo, six-person limit, and strong English support give the experience substance.
I would especially choose it for a family, a textile enthusiast, or anyone curious about how traditional color is made. The cotton furoshiki offers good value at the base price, while a scarf upgrade is worth considering if you want something to wear.
Think twice if you need wheelchair access, a meal, a large garment, or a guaranteed uniform pattern. For everyone else, this is a thoughtful way to spend two hours in Kyoto, with a useful cloth, a better understanding of indigo, and a direct connection to artisans who are keeping the work alive.
FAQ
Where does the indigo dyeing workshop take place?
It takes place in a historic indigo studio in western Kyoto. The exact address is provided after booking, and the journey is about 30 minutes from Kyoto Station by train and on foot.
How long does the experience last?
The activity lasts about two hours, with the stated duration ranging from 1.5 to 2 hours.
What item is included in the price?
The included item is one cotton furoshiki measuring approximately 45 to 50 centimeters. The activity information also refers to a handkerchief or tenugui option, so confirm the exact base item when booking.
Can I choose a scarf instead?
You may be able to upgrade on site for an additional fee. Listed options include a cotton scarf, silk scarf, and wool stole.
Is the workshop conducted in English?
Yes. The experience is offered in English and Japanese, with a bilingual cultural host providing interpretation and support.
Is the workshop suitable for children?
Yes. The minimum age is eight years old. Children should wear comfortable clothes that can get dirty and follow the artisans’ instructions around the dye vats.
What should I wear and bring?
Wear comfortable shoes and casual clothes that can get dirty. An apron, gloves, and shoe covers are provided, but there is no changing room.
Is the studio wheelchair accessible?
No. The traditional studio has wooden floorboards and does not have wheelchair access.
Just added around Kyoto
- Taste of Nishiki Market Walking Food Tour with Local guide★ 5.0 · 17 reviews
- Kyoto: Sushi Making Class with Sushi Chef★ 4.8 · 64 reviews
- Kyoto: City Secrets eBike Tour★ 4.9 · 196 reviews
- Sacred Pathways: Discover the Philosopher’s Path of Kyoto★ 4.9 · 20 reviews
- Private Tour to Monkey Park and Arashiyama Highlights★ 5.0 · 22 reviews
- Private Nara Tour from Osaka – Meet at Your Hotel★ 5.0 · 22 reviews
- Private Sake Tasting in Central Kyoto with Sake Sommelier★ 5.0 · 13 reviews
- Kyoto : Private Custom Walking Tour With A Local Guide★ 4.6 · 144 reviews
Private, compared.
Private Tour to Mt. Fuji and Hakone (Fully Licenced Operator)
Read our review →
Tokyo Customized Private Tour (Must See Places in 1 Day)
Read our review →
Mount Fuji Full-Day Private Tour from Tokyo (Customizable)
Read our review →
Tokyo 4hr Private Tour with Government-Licensed Guide
Read our review →
Kyoto 6hr Private Tour with Government-Licensed Guide
Read our review →
Tokyo Customized Private Tour: See Top Attractions in 1 Day
Read our review →
Hotspots & Hidden Gems Walking Tour Private or Group
Read our review →
Hiroshima / Miyajima Full-day Private Tour with Government Licensed Guide
Read our review →Browse the lists this tour appears in